
Despite the name, a 3d pen is not going to let you draw in the air. You CAN pull up plastic from a point and wait for that stretch of plastic just formed to harden a little, then go back... It's not easy, it's not ideal. The 3d pen however is really good at laying down plastic on surfaces though. So if you want to draw in 2d over a paper design you drew, on glass of a silicone mat - you'll get a decent output. Then you can hold multiple 2d pieces together, and use the 3d pen to connect pieces using molten plastic like a glue.
The other really useful application is fixing things. broken pieces of plastic? Mend it! weak plastic arm? Use the pen to reinforce it. I've been using it for modifying toys - reinforce weak points, sometimes heavy modifications breaking parts off and adding back plastic using the pen in a different way.
My most recent usage has been with radiocontrol toys. Durability is an issue, especially impact and heat. ABS isn't a bad choice, but PET-G has more flex which lends it toughness. Nylon would be ideal, but it's more expensive, and You need need more temperature than pens allow to handle nylon. 250-260C is ideal, but my pen only gets to 230. I'm using PET-G.
I started with a WPL B1 - It's a non-hobby-class toy - initially. But with steel c-channel chassis rails, metal leaf springs, and lots of upgrades including metal axles, gears, shafts etc - it becomes hobby grade. The "servo" is a laughable thing. An all or nothing design consisting of a motor with an obstruction to act as end points. As a result, when turning, there's no proportional control, and the straining motor acts like a short reducing battery life and starving the motor of power. I used a soldering iron to melt away excess plastic to make room for a real servo. The pen was used to "draw" a bracket in place. The bracket goes around the existing screws and can be removed if I ever need to change to servo. This just took a few minutes.

For another example, I needed a bracket to hold a Axial SCX type transmission onto a car I've been working on. I needed a bracket because there wasn't room for it. The transmission would need to go in at an angle.

I started by drawing plastic around the screws in the base of the RC car, and plastic at the base of the transmission around the screws.

I held the transmission in place and connected the base of the transmission to the plastic around the bottom screws. It doesn't stick to metal screws, but it can take some wiggling. Here it is with the bottom 2 screws.

Since space is limited, I can't even fit the pen where I need it. So I'm drawing plastic, Extending the base to a point I can get to. PS: that's a silicone coaster, not a floppy disk (though it is floppy).

I put the motor back on the 2 lower screws, and extend the bit I drew to connect to the other screws. After letting it cool and harden I pulled it off and reinforced the beams drawn.
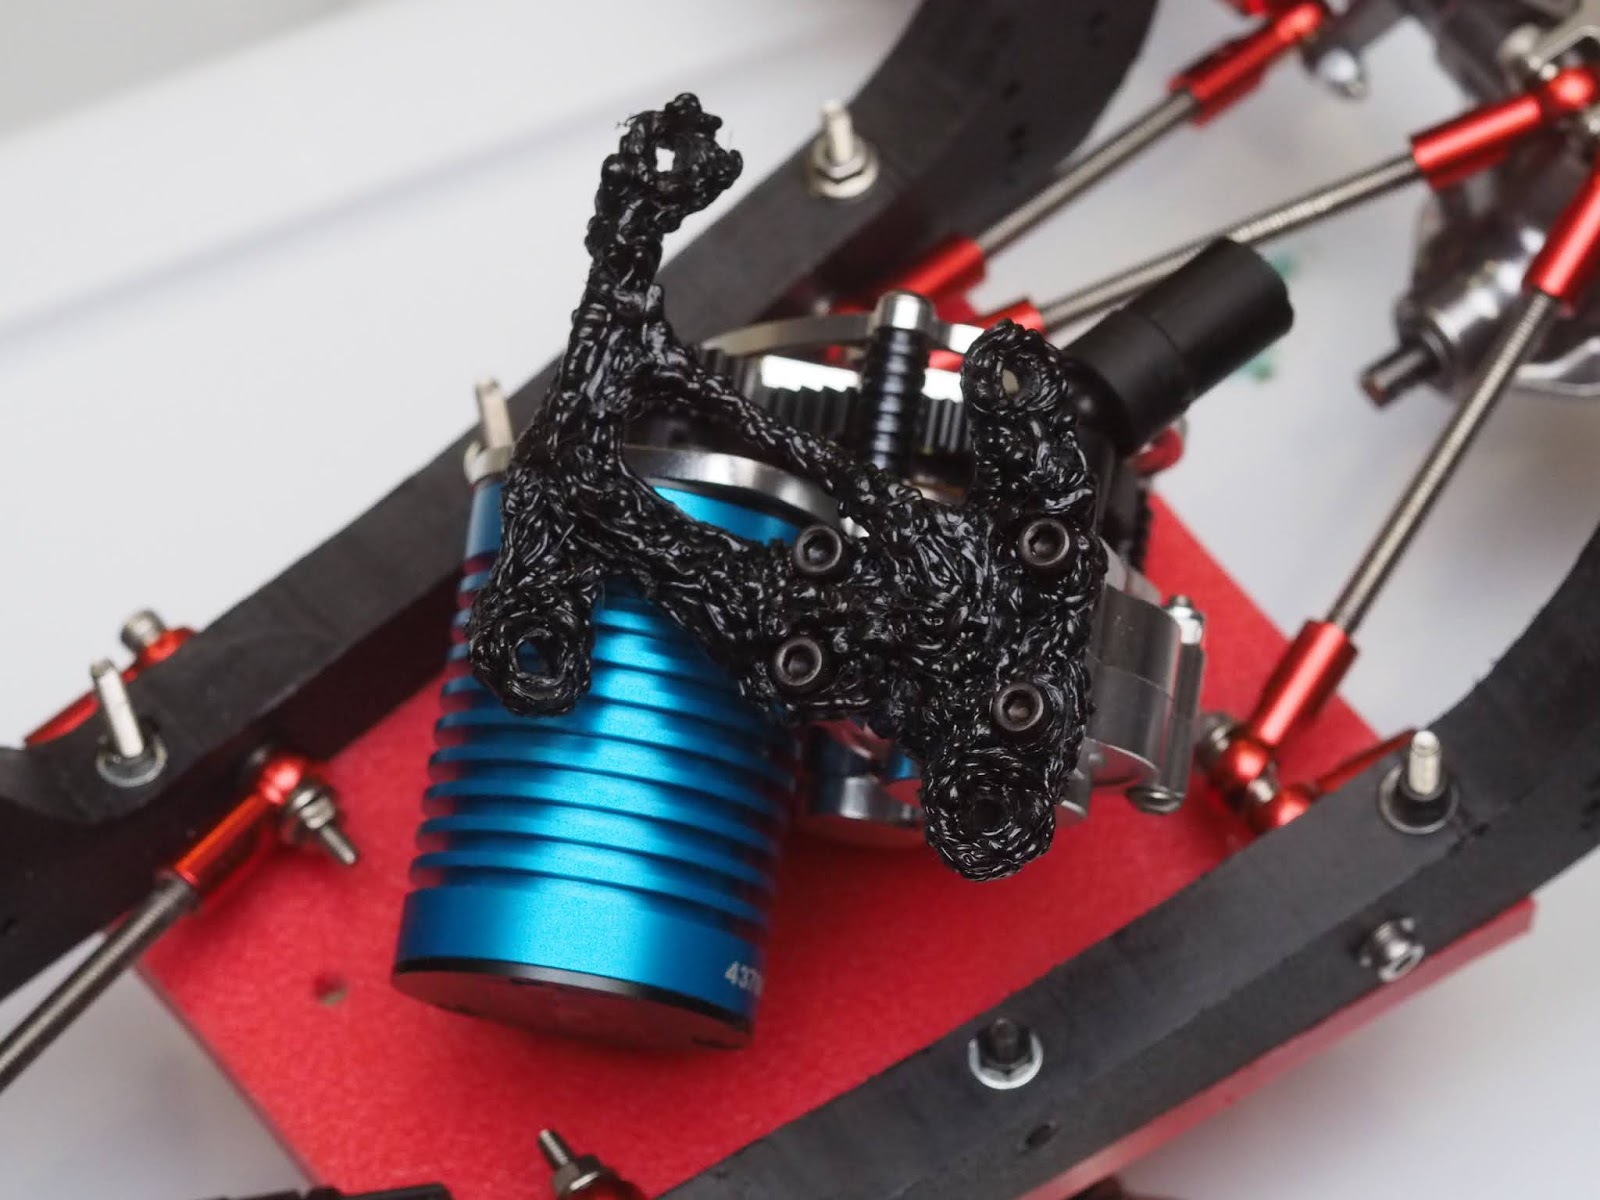
Final product: The bracket is strong enough to take impacts. It hold the transmission in place firmly, while having a little give to dissipate energy of impacts.

Notes:
It does look a little messy. These fixes aren't going to be that visible. That said, should a smoother look be required, practice does help - or use a soldering iron or wood burner to smooth the lumpy finish.