Sunday, March 27, 2022

Headphones 3 : Moar!

Heavy modding:

 I've been quite pleased with my headphones so far. Especially those I've made using titanium drivers. I had a relatively high-quality "tesla" driver available that I believe is even higher quality than the last "tesla" driver I used. The outer casing is anodized metal. 


Hmm, what shall I do with this one? I do have a rather ragged Symphonized headset...

My next pair of headphones is now obvious. I've always liked the build quality of this headset. It's not really solid metal. it's not really thick,  and there's plastic in the cup's walls. That said, the headband, the sliding mechanism, and stirrup are all steel, and have decent flex. It's not something I'd worry about being unable to take a beating. The main reason I used this headset over my others in the past, was comfort - not sound quality.


Let's Build!

I started with my pair minus the torn earpads. 

I've had this a few years, and it still looks great. Time to make this muffled mess sound better 😁

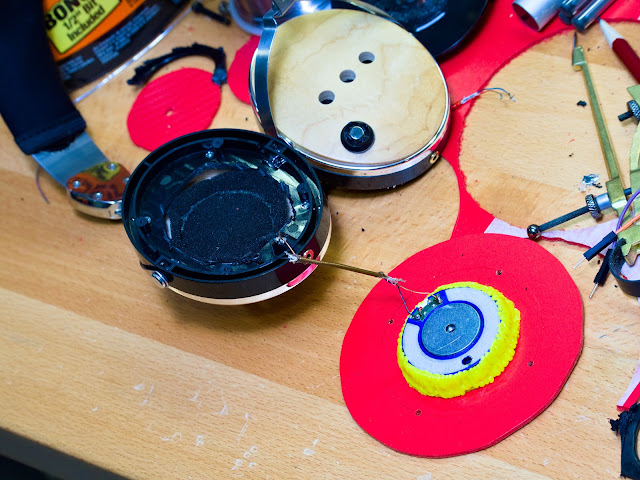
I twisted it to display the speaker side. I'm removing that entire baffle, and of course, replacing the speaker. I'll use a larger plastic baffle for a bigger more comfortable pad too.


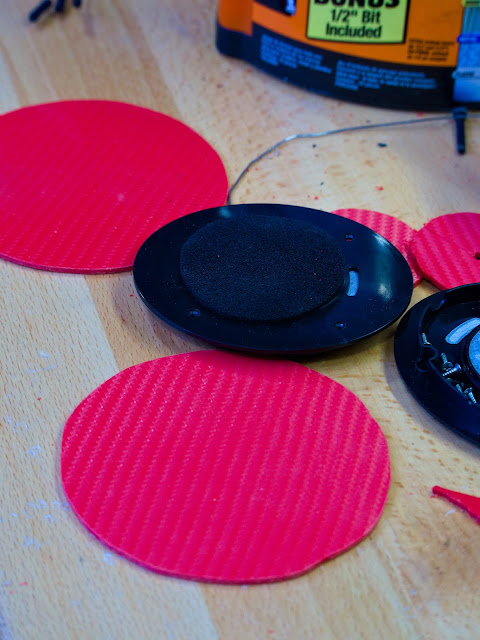
Sticking with Kydex. Easy to cut, and I like the patterned finish I get on the sheets. Durable as hell too.


I started by measuring the diagonal of the 4 holes. I drew a circle on the baffle I cut using that as the diameter. Next, I clamped the original baffle down so that I could see the drawn circle on the new baffle through all 4 holes. With that, it was aligned. I drilled the 4 holes that would bolt this new baffle to the cup.


Now that I have the baffle that bolts to the cup, I need to attach the speakers. I drew another circle, 50mm in diameter, and used that to estimate where I'd drill 4 more holes.


After drilling holes to fasten the speaker, I needed to either drill a big hole and fasten a speaker grill, or fashion my own. I opted for the latter, drilling out a pattern within the 50mm circle's perimeter.


I turned my attention to the cups now. I could leave this closed-back, but from all the drivers I've used, it just seems that sound fidelity suffers this way. I could always reduce the hole's effect covering up from inside, so wanting to go back to "closed" remains an option.


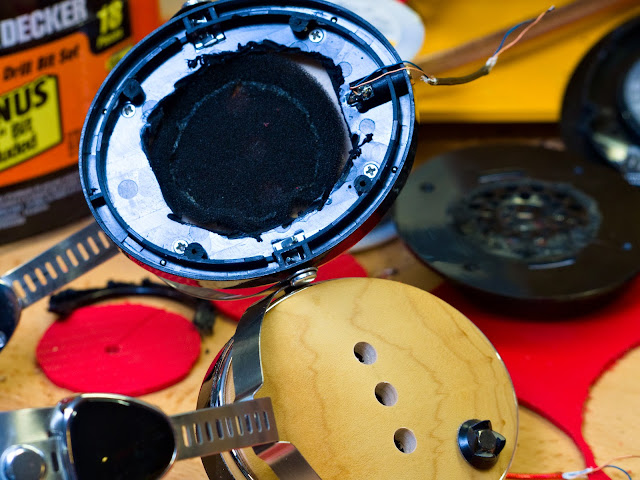
The original baffle was used as a screw template. Now I'm, scavenging the foam it used as a sound filter to cover the cup's holes from the inside, where it will serve as a dust filter.


Foam covered the holes nicely.


I fastened the speaker to the baffle in the usual way. 3d-pen makes that easy. The receptacle however gets in the way of the plastic inside the cup. I simply removed the plastic getting in my way, grinding it out using a rotary tool.


It's a rough cut, but that doesn't matter. The speaker can now fit.


Finally, bolted on the baffles and added the pads. everything looks quite clean!


Sound?

The sound is far improved. My usual tests (described at the end of my first DIY-Headphone article) were handled quite well. From hearing the seagulls in "Faded",  the triangles in "The Trio" to the creaking of piano keys in "Mad World". The details are all there. Somewhat more nuanced than the titanium driver in my second article provided, but the bass is thicker, fuller. These headphones appear easier to drive too, picking up higher volumes than my last pair. Chuck Mangione "Feels so good"? It sounded so good too 😉


Final Thoughts...

Comparing this with my previous builds (first, second), it may be not only simpler to use these headphones as a base, but also cheaper. They can sell for ~$35 as refurbished. That gets a good build quality headband and stirrups, cups, jacks, and cable with an in-line mic. I also value my time. I did this in an afternoon. I didn't have to wait for the glue to dry and paint to finish. I'm definitely considering this option again for future builds.


Saturday, March 19, 2022

Headphones: Part Two!

Modifications to the original and other projects:

Since making headphones in my last foray, I've swapped out the pads, added headband padding, and thoroughly enjoyed them. I've also given them to my biggest fan - my daughter 😉. Then I made 2 more and gave them to my brothers' in law.


Mark III - Wool diaphragm drivers in these. I removed the paper backing, and with the 3 holes on the cups, these are bass cannons. Clarity isn't great, but it's better than my old Razer headphones. The olive wood cups are beautiful and strong. Have to redo these with better speakers sometime. I should note - The headband is from a noise protection headset. It's light and durable - but barely long enough for my head. The noise protector with a plastic headband and thin metal stirrups as I used in my previous set are more adjustable and more comfortable. I'd wager this is more durable though, and for smaller heads would also be more comfortable.


Mark IV - These cups are beechwood. I was more conservative with the paper backing removal, exposing only a single hole in each driver. The interesting bit about these is that each side has 2 speakers, for a total of 4. Each side has a titanium diaphragm driver and a composite driver from a JBL club. The wool driver went in at a bit of an angle slightly behind the titanium driver with the intent being that dips in the frequency response of one driver would be catered for by the other driver. Clarity on these absolutely floored me. I'm didn't measure anything, but there were times while listening to music with these that I'd pause and try my previously made headsets. Could I what I heard on those? Why did it stand out? I'd flip back and forth listening wondering which was cleaner. The headband on these was from a racing headset. It's butch - made to last, yet quite configurable. I used a couple headband bands to cover up the headband and make it neater and more comfortable.


Getting serious on Mark V:

I really liked the dual diver setup on the Mark IV. After finding sources for cheap speakers off eBay, AliExpress, and earphonediylabs.com I had several options for my next (several) headphones. 

The titanium 50mm diaphragms were always pleasing. I tried several other options bare before settling on some "Tesla" type secondary drivers. Beyerdynamic's higher-end units are advertised as using Tesla drivers. A Tesla driver is a driver where the magnetic field strength of the air gap the voice coil moves along in exceeds 1 Tesla. A Tesla is the unit of measurement for magnetic field strength.

I decided to stick to a similar layout as the Mark IV. slightly off-center titanium driver and angled secondary driver.


So nice of the shipper to add a protective speaker grill for the 50mm titanium driver. The claim for most of these is that they are replacements for or directly from AKG 371 headphones. Maybe they are? I've no way to test. They do sound fantastic though!


Measure twice cut once. Sticking with Kydex to hold my speakers. I used my soldering iron to burn a hole in the paper backing for the titanium driver.


I used the 3D pen again to hold the speakers in place. The angled speaker does not rest against the 50mm. If it did, then the diaphragm would probably rattle against it at loud volumes. With the 3D pen, I was able to hold it off the speaker and "draw" some support in place before moving onto the rest of the receptacle.


I think the final result looked fantastic. The speakers won't budge from there or rattle. The carbon fiber texture looks great, and those speaker grills just fit flush in the holes I cut with the scroll saw.


The headband is a DIY replacement from AliExpress. I used the same beechwood cups I used in the previous 4-speaker headphones because it's large enough to hold the speakers. So large, I didn't really have space to pass the cable through the top, so instead, it's coming from the sides. The 3.5mm unbalanced jack is not dead center, but slightly forwards. This way the jack isn't constantly hitting my shoulder when I move my head. With cups this large, it's difficult to find pads. These are generic 110mm pads, stretched to fit over the 113mm discs. If I were to build these again, I'd make the cups a bit deeper. The cable is knotted inside to prevent it from being pulled externally and breaking a solder joint. That knot barely fits with the speaker in the available space. The angle also helps with the V-Moda boom mic positioning.

Up till now, I've been making all my headphones use unbalanced jacks. I'll have to try a split balanced cable next time. I doubt I can hear a difference, but it will make design a little easier without having the overhead cable to worry about.

I did end up opening this up and opening another hole in the titanium paper backing, and 2 on the tesla speakers to increase bass response. Satisfied for now 😊